By Chris Britton. Published in the N-News Spring 2015. Vol. 30 No. 2.
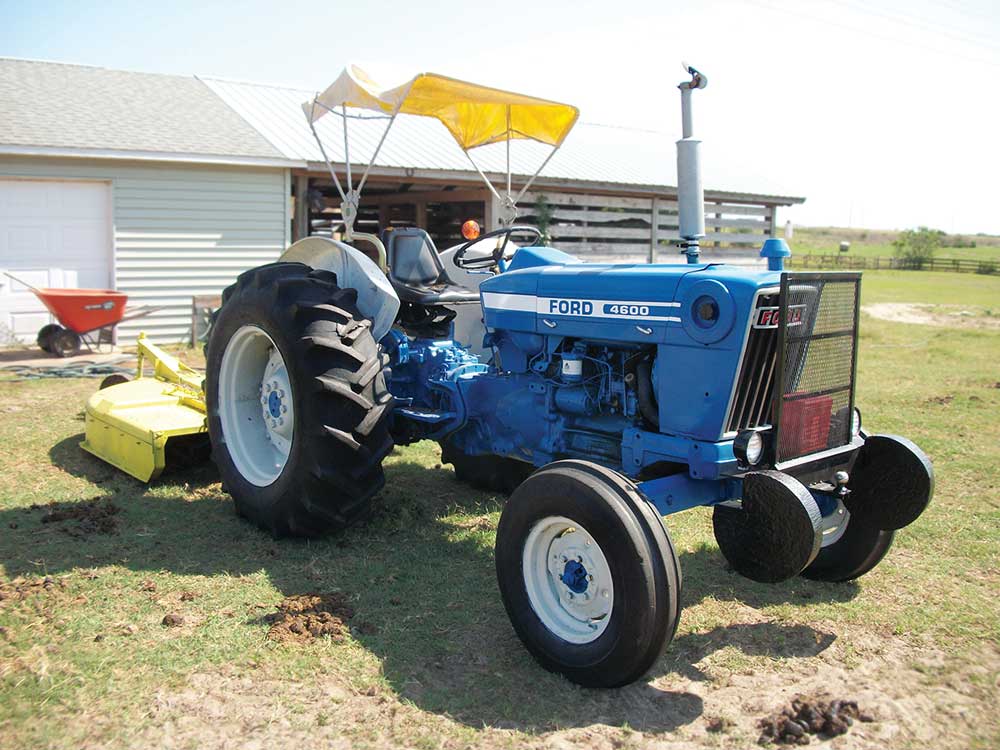
Hand-cast front weights painted and in place on Chris Britton’s Ford 4600.
Mowing season comes early in my part of Florida. Weeds will be tall and there will be a lot of work to do. I had picked up a 1978 Ford 4600 a few years ago and have been itching to use its 6′ mower to do some trimming through trails and close mowing around trees. The problem was the front end would get very light with the mower raised up to get the rig loaded onto my trailer. So light, in fact, that the front wheels came off the ramps while I was half way up the ramps – not a very good feeling.
I knew I needed some weight up front and so I checked the tractor budget. There wasn’t much money available. The dealer wanted about $2.50 per pound for cast iron weights and I had been unable to find any garage sale weights that I could adapt. My next thought went back to how I solved my rear weight problem with my loader tractor – cement weights.
Since my tractor has a homemade heavy angle iron bumper, I decided to make them hang from it by creating a form inside the tub so the weight would fit up to the face of the bumper and hang mostly under it.

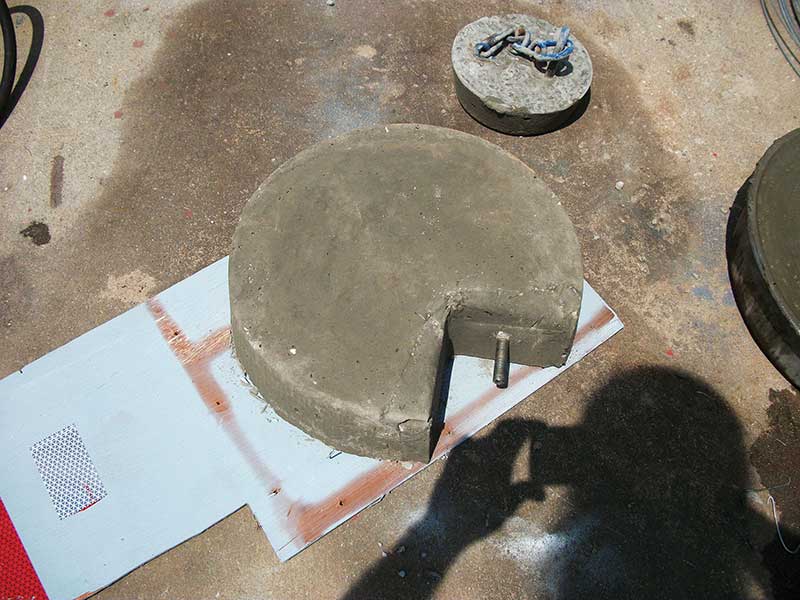
Homemade cast weights specially designed to hang from the 4600 bumper.
I started thinking about how to form removable front weights and while looking around the shop, found an old deep style animal feed tub. I thought, “Wow, that would make a nice round weight.” I dug a piece of Styrofoam out of the trash that had come fitted around some shop tool. Using a long razor knife, I cut a corner out of it and beveled the edges where it would meet the pan.
I also drilled a hole in the foam to allow the shank of a bolt to stick into the open area. I then used duct tape to tape the foam into the pan so it wouldn’t leak concrete around the foam.
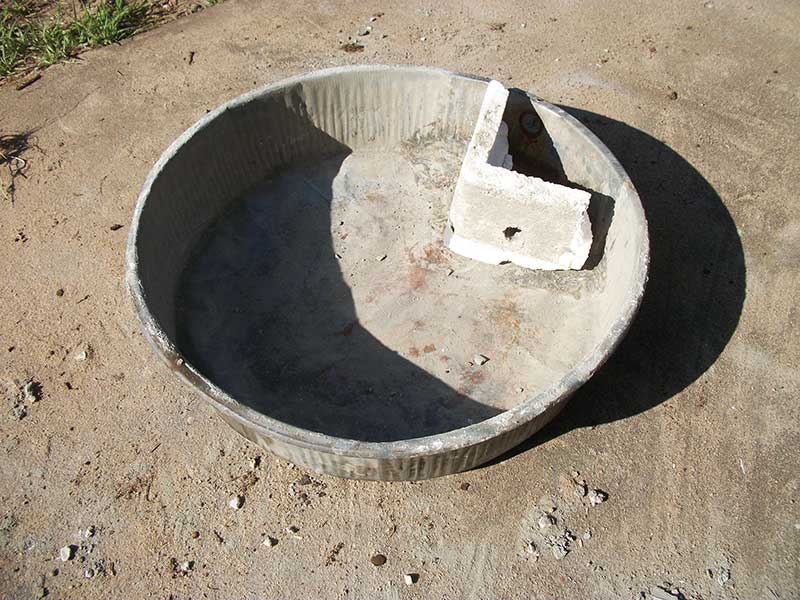
The form pan used to cast the weight, with the styrofoam and bolt in place.
I used a long carriage bolt that had a slightly rounded off shoulder on it as the mounting stud. I wrapped a strip of tape on the threads to prevent any concrete from traveling between the foam and bolt. I embedded some heavy brace and fence wire into the form about half way through the pour. I used thin gauge wire from the pan edge to the embedded wire to hold it midway through the concrete instead of settling to the bottom.
For my test piece, I used a rag with diesel on it and rubbed it on the pan – that was the release agent so the concrete would pop out!
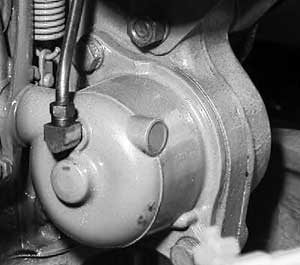
The cast weight with bolt protruding. The diesel made for a handy release agent!
The results were much better than expected! I then measured and drilled my bumper and hung a couple on and painted them black to match. (See the top photo.)
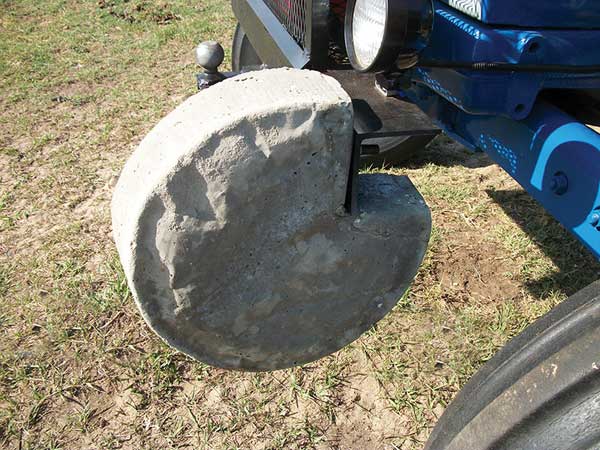
EZ Front weight as mounted on the bumper.
On subsequent pours, I used spray engine cleaner as the release agent since it was easier to apply and then used reclaimed fender bolts as the mounting studs. Dumping the forms over after curing made the foam come out on the stud. All I had to do was reseat the foam in the pan with new tape and then pour another. As a side benefit, I usually have a shovel full of mix leftover after pouring, so I used a soft side rubber feed bowl to make a few small weights with wire handles. These will be good to hold down tarp corners or hold lids on garbage cans during windy days.
The total cost was $10 in concrete, some salvaged bolts, spare wire and leftover paint. It took about 10 minutes to mix the concrete, set the form and pour. Super E-Z and cheap, yet effective. Just the way I like it.
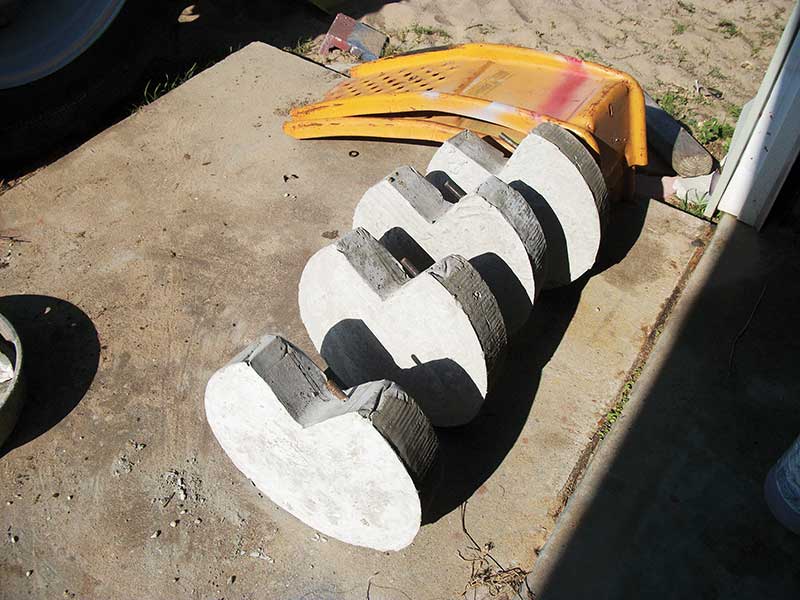
EZ weights ready for mounting – about 50lbs each. Easy!
Chris Britton is a long time contributor to the N-News Magazine specializing in technical tips, fixes, solutions and making the seemingly complex, easy!
Did you enjoy this article? Subscribe to the N-News Magazine for more essential N-News! Subscribers have made the print version of the N-News Magazine a success for 30 years. Pick one up today!
 (This article originally appeared in Volume 28 Number 1, Winter/January 2013) In this series of articles, N-News contributors share their lessons learned and observations in buying a used Ford tractor. Here, longtime contributor Dave Erb writes about his personal checklist for looking at a 9N, 2N or 8N to purchase. While all N models are fairly dependable, Dave says, as production continued into the fifties improvements to the tractor were undeniable. What follows are some pointers that will prove helpful for anyone pondering the purchase of one of these faithful tractors.